Every time I try, I fail. I always fail to set up a MaxDB standby database using the Database Manager GUI. It is neither very complicated to set up a standby system nor do the wizards look very different every time I try it. Nevertheless, I manage to fail all the time. As an reminder for myself and as a tutorial for all MaxDB beginners, I decided to write it down. Step by step and with lots of screenshots.
MaxDB High Availability
MaxDB offers a great number of high availability options: Backup and Recovery, (Database) Snapshots, Using copied Snapshots or Split Mirror for data backup, Cluster for Failover, Shadow database (standby database) and Hot Standby. Check the MaxDB manual for the details.
Backup and Recovery has been available in MaxDB since ever. It supports pretty much everything that one can ask for: parallel backup media for performance reasons, automatic log backup, incremental data backup, support of major third party backup solutions, and, and, and … Database snapshots are a fast and efficient way to freeze the status of a database and to recover the snapshot very fast.
Modern storage systems and some operating system level solutions allow the creation of consistent snapshots of file systems and disks while applications are writing data to the disks. The creation and recovery of a snapshot is usually very fast, much faster than reading all records from the database and transferring them to an external backup medium. The data and log volumes of MaxDB can be backed up and duplicated this way to set up standby systems on which resource consuming tasks can be run, e.g. structural integrity tests or backup operations.
Using a shared disk approach you can integrate MaxDB in Cluster solutions. If a MaxDB server crashes for whatever reason, the cluster client can take care of the application switch over and start a Standby MaxDB server in the Cluster which runs on the same volumes as the crashed MaxDB server.
MaxDB Hot Standby is one variant of such a shared disk approach which reduces the number of single points of failures (data area and log area) down to one (log area) using very secure, specialized hardware. In a Hot Standby setup several MaxDB database instances run each on their own data area but share the log area. One Master database instance is online and writes to the log area while a standby system reads the recently written entries from the log area. If the master fails, the standby system has to repeat a few log entries in the worst case before it can be switched in online mode. Usually, the replay of the log entries will take much less time than it takes to redirect the application clients. That means that the switch will be transparent to the user.
Shadow database / Standby database / Cold Standby
All solutions have their own advantages and disadvantages. Most users decide after an evaluation of the pro and cons, the costs and the definition of the maximum downtime that is acceptable for their business that shadow databases are a perfect solution for them. Shadow databases have been also called standby databases or cold standby databases in other versions of MaxDB. All three terms mean the same things. The basic idea of a shadow database is very old and proven technology: you create an initial data backup on the “master” system, recover it on the “standby” or “client” system and do a log shipping from the “master” system to the “client” system to keep the client up to date. You ship the log backup from the master to the client and recover the log backup on the client. The frequency of the log backup and the recovery time determines how many “minutes” the client is behind the master. The more frequently you do the log backup and recovery, the less the data sets of the two systems differ from each other.
When you read this, you might wonder why I said that I always fail to set up a shadow database. It is it so difficult follow the instructions in the MaxDB manual (Glossary -> Standby Database) ? No it’s not. But I know that I’m not the only one who always does press the wrong button when the wizard asks me too choose between “Back”, “Continue” or “Close” and I manage to put the standby system in online mode before I have imported all log backups. This is the only “no, no” you have to take care of and I …. – here comes the tutorial.
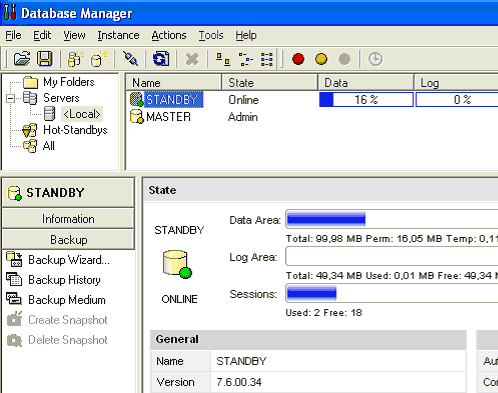
The scenario that is used for the tutorial is one Master database with 100 MB data area and 50 MB data area and one Standby database instance on the same host with the same configuration. I have used the latest versions of the MaxDB software components to create the screenshots: MaxDB 7.6.00.34, Database Manager GUI 7.6.00.25 (123505), SQL Studio 7.6.00.27 (123692). If you run other versions of any of the software components, some screens and wizards might look slightly different, but the basic working is pretty much the same.
Creating the Master instance
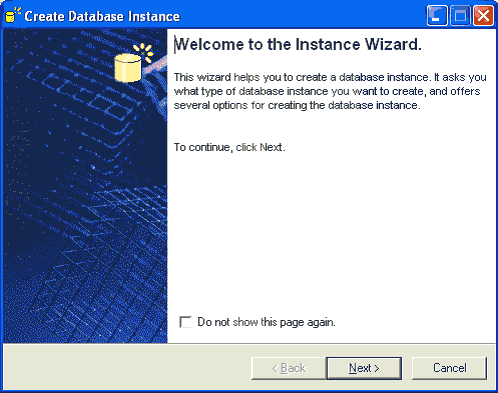
Start the Database Manager GUI and run the Database Instance Creation wizard: Instance -> Create…
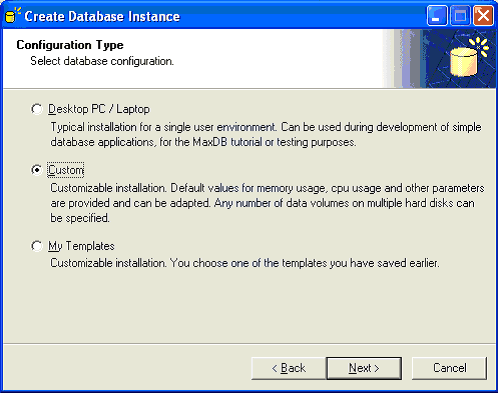
Choose the Configuration Type “Custom”. We want full control over all options and no pre-defined settings that might fool us later on.
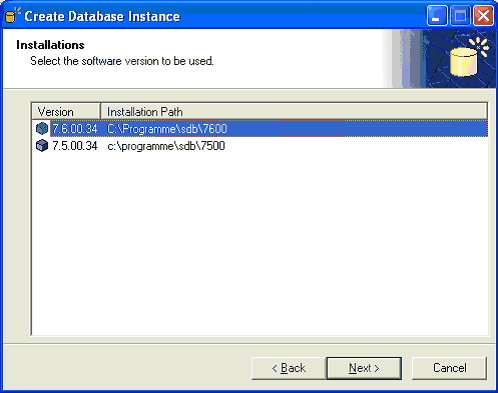
Give the new database instance the name “MASTER” and choose a software installation to be used.

Deselect the option “Automatic extension of data areas”. We do not want to risk that during our tests with the MASTER instance, the data area silently grows beyond the size of the data area that we reserve for the STANDBY instance. Of course, this is exactly what happened when I tried to create the screen shots for the first time. Now you can imagine why I said that I always fail …

Assign the password “DBM” for the DBM user and go for the default settings until you get to the screen for the data area configuration.


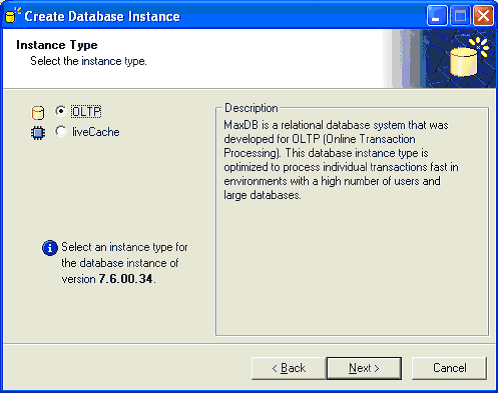
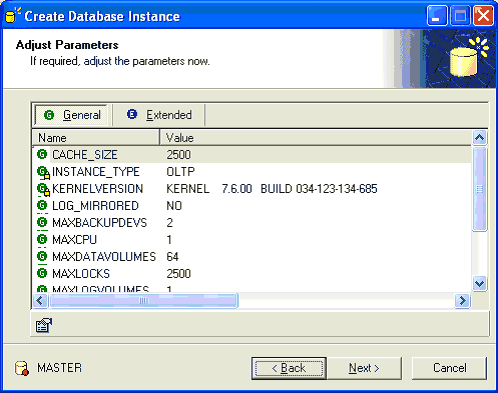
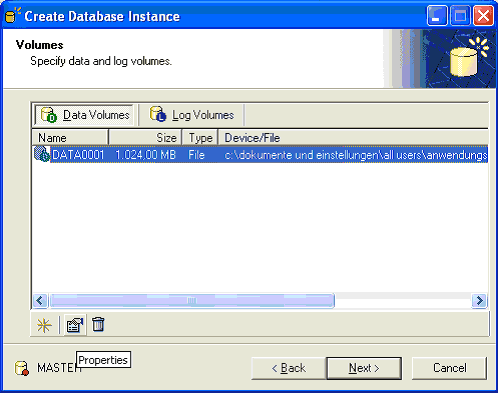
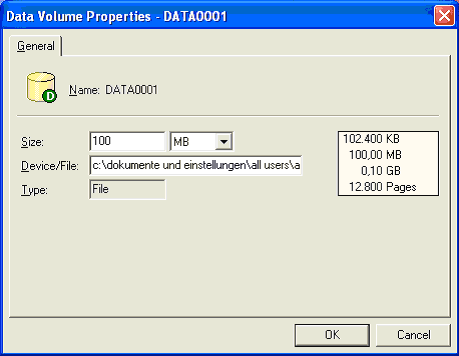
The default setting of a 1GB data volume is far too high for our purpose. Select “Properties” and set a volume size of 100MB. No changes are needed for the log volume. It will be given a size of 50MB by default.
Use the password “DBADMIN” for the DBADMIN user.
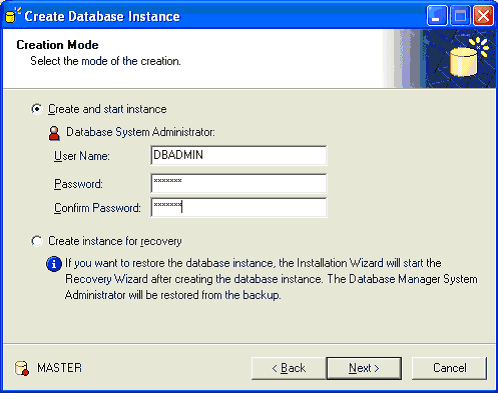
Deselect “Activate automatic log backup”. Again, we want full control over all settings and activate the automatic log backup manually a bit later. That’s a few clicks more, but no magic going on behind the scenes can surprise us and the risk to forget anything is lower.
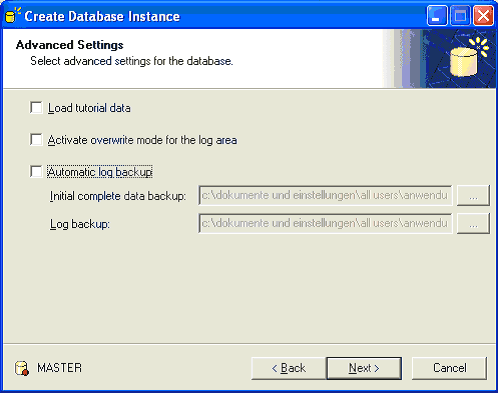
Finish the instance creation wizard.
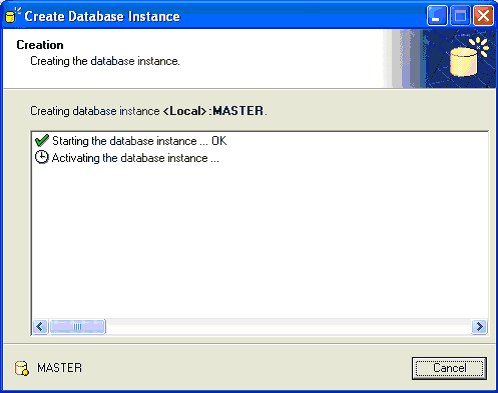

Initial data backup on the instance MASTER
Like with so many HA-solutions the first step is to carry over the data from the master instance to the standby instance. The different HA-solutions use different ways to perfom this action: file system and storage system based snapshots, backup and recovery, export and import, shared disk approaches, … When you set up a MaxDB shadow database, the way is to run a data backup on the master system and recover it on the standby system. To keep the standby system up to date in the further course, you recover log backups from the master system on the standby system. This is pretty much the same what MySQL Replication does: you do an initial copy of the data, for example using mysqldump, and then you tell the standby systems to automatically fetch log entries from the master system. MySQL Replication does the log entry replay automatically, but the basic idea is the same as for MaxDB shadow databases.
Start the Backup wizard on the instance MASTER to create a complete data backup.

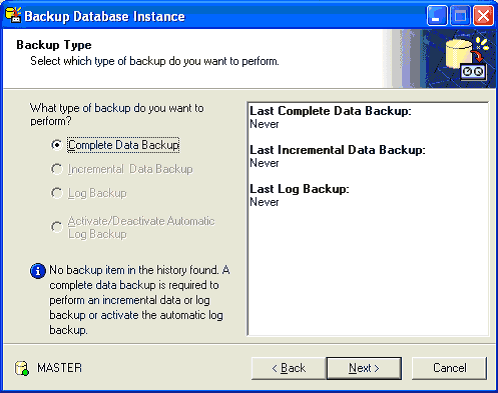
Tune the settings for the default backup media by pressing the “Properties” icon. We want a speaking name and an easy to remember storage location for the backup media. Use the name “MASTER_DATA” and the file specification “C:\initial_mater_data_backup”.
A backup media is kind of a template that holds all information needed to perform a backup of a certain kind and store the backup data in the storage locations associated with the media definition. Every backup media has a name to which you can refer when you use CLI commands to perform administrative actions.
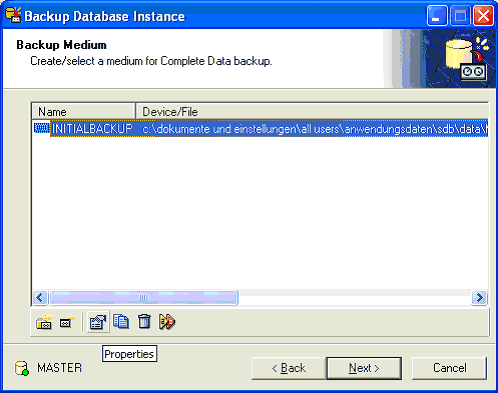

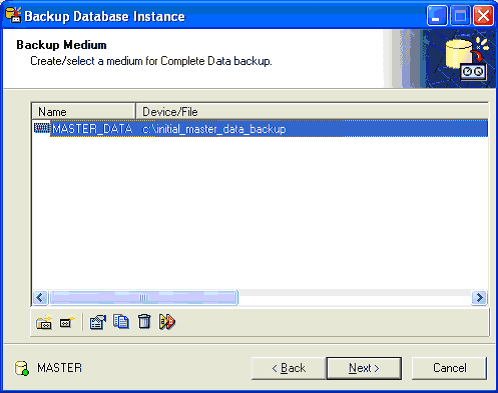
Run the initial data backup.
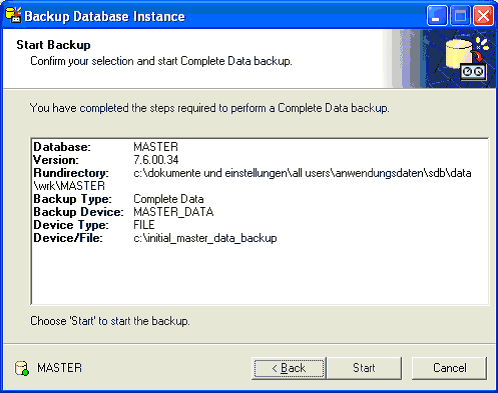
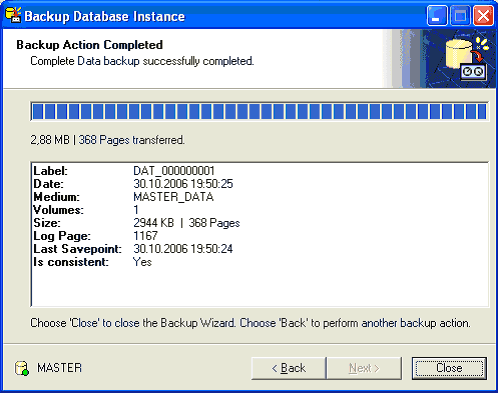
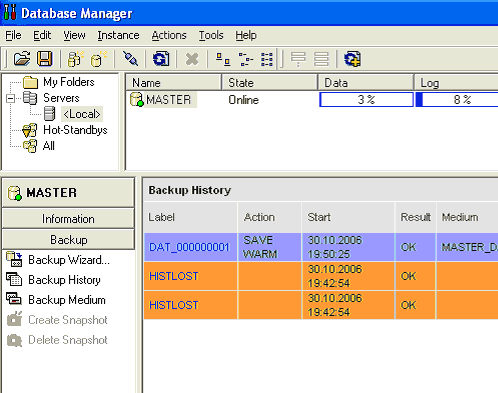
Make sure that you Backup History looks similar to this. If not, you did something wrong. Go back to the beginning and start again.
Activating the automatic log backup on the instance MASTER
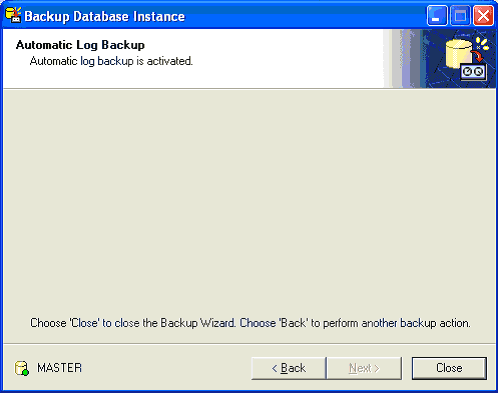
To perform the log shipping that updates the standby system, you need log backups. The most comfortable and secure way to handle the log backup task in MaxDB is to pass the task over to MaxDB and let MaxDB run a log backup whenever needed. MaxDB will run a log backup if a log segment has been finished. The log area is logically divided into several log segments. Note that a log segment is not a physical structure in any way.
The size of the log segments can be configured with the database parameter LOG_SEGMENT_SIZE. By default, MaxDB sets it to roughly 1/3 or the total log area size. That means, whenever about 1/3 of the log area has been written with log entries, the automatic log backup will be started. One the log backup has copied the log entries to a backup media, MaxDB allows the log writer to reuse the log segment and to overwrite the backed up log entries cyclically.
That means, that the setting of the parameter LOG_SEGMENT_SIZE determines how often an automatic log backup will be performed. “How often” can hardly be expressed in minutes or seconds as the number of log entries that MaxDB writes depends on the database workload and the types of queries that will be run on the database. Run your own tests to find the optimal setting for your needs. In this tutorial we will not experiment with the LOG_SEGMENT_SIZE setting. That is left over as an excerzise for the experts that know how to use the wizards ;-).
Start the Backup Wizard to configure the automatic log backup on the instance MASTER.
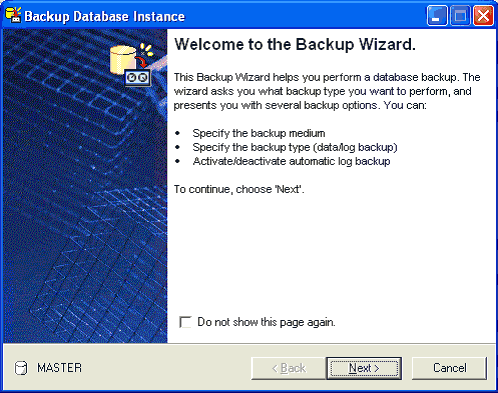
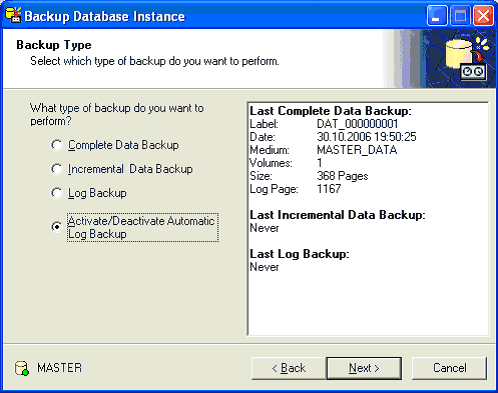
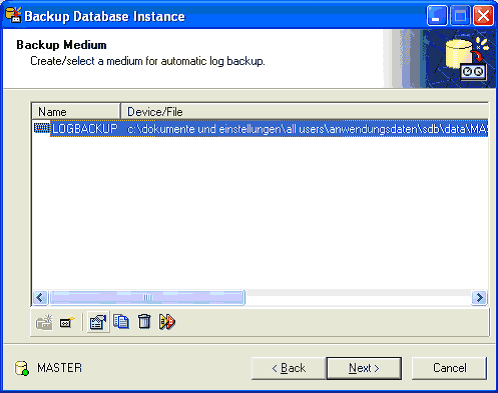
Again, we do some fine-tuning for the backup media: MASTER_LOG, C:\master_automatic_log_backup. That’s it. Make sure you use the settings shown on the screen shot.


Generating some log entries on the instance MASTER
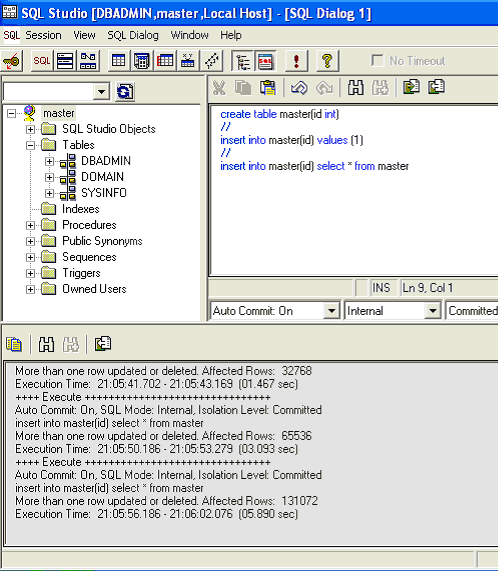
To enforce a log backup, we need to generate some log entries on the instance MASTER. Open the SQL Studio, create a table with one column, insert a single row and use INSERT INTO master SELECT FROM master to duplicate its size with every execution of the INSERT statement. That will create soon a many records and cause a log of log entries to be written. Stop when the SQL Studio reports that 131072 records have been inserted.
CREATE TABLE master(id INT)
//
INSERT INTO master(id) VALUES (1)
//
INSERT INTO master(id) SELECT id FROM master
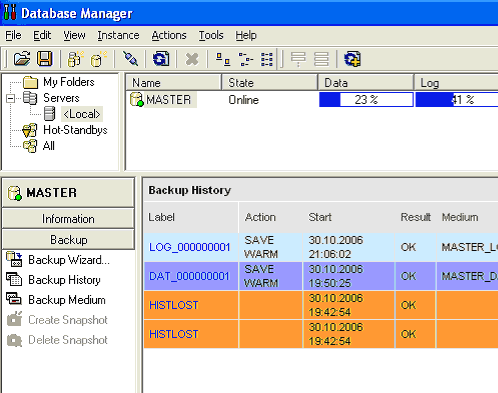
Open the Backup History display of the instance MASTER in the Database Manager GUI and check that a log backup has been written. If not, wait a minute, the backup might be running at the moment. If that also does not help, create some more records and/or check the protocol files for error messages.
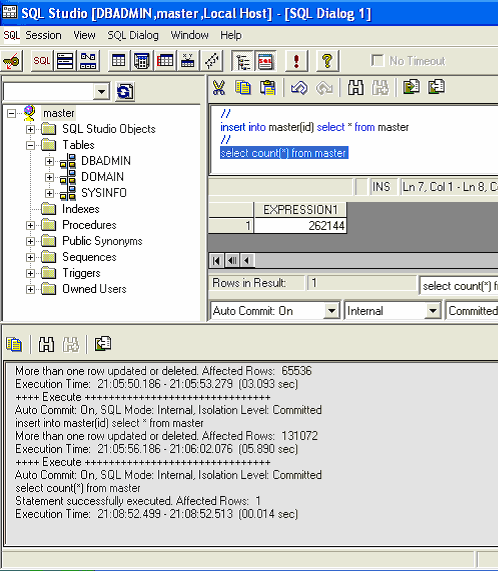
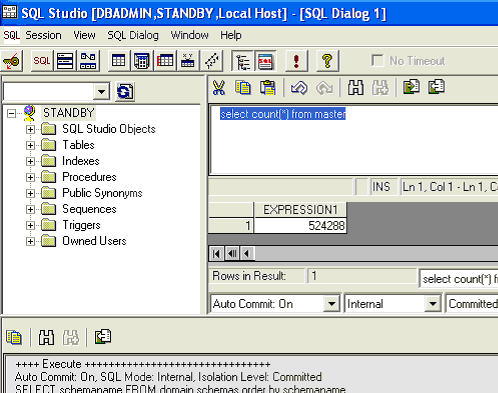
Switch back to the SQL Studio session and count the number of records in the table “master”. We will compare this figure later on to the number of records that we find in the standby system.
Creating the standby instance / the shadow database
Now that we have an initial data backup and a log backup that we can import, we have everything together to set up a standby system and recover a log backup into it. Start the instance creation wizard to create the shadow database. As most steps in the wizard are exactly the same as shown above during the creation of the instance MASTER, we have skipped some screenshots and show only the screens that need different settings.
Create a new instance and give it the name “STANDBY”. Make the following choices in the course of the wizard:
- Configuration Type: Custom
- Installations / Server version: use the same as for the instance MASTER – usually this is not recommended, but go for it
- Advanced Options: Deselect “Automatic extension of data areas”
- Authorization: Use the password “DBM” for the DBM user
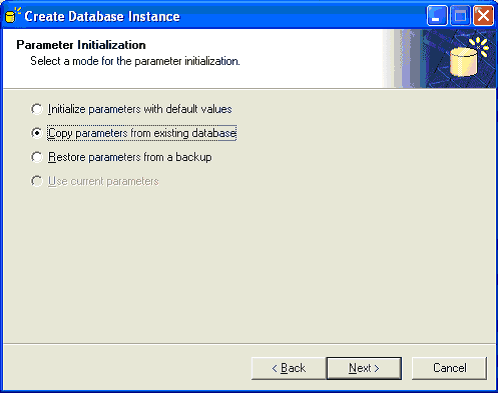
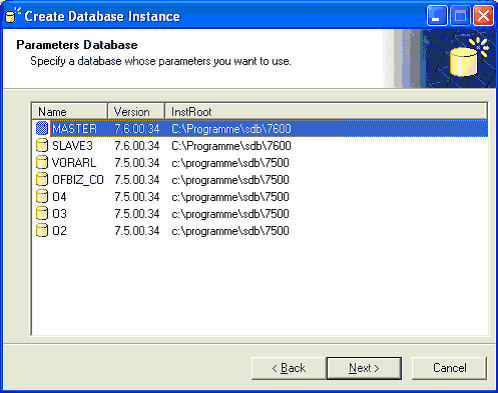
After that you get to “Parameter Initialization”. Simply copy the parameters over from the instance MASTER. No changes to the parameters are needed.
If you plan to restore the parameters from a backup, make sure that you check all parameters that contain file paths! If you do not do that, you might end up with two database instances using the same directories and files which of course will not work.
Continue with the wizard:
- Adjust Parameters: no changes
- Volumes: resize the data volume down to 100MB, log volume 50MB
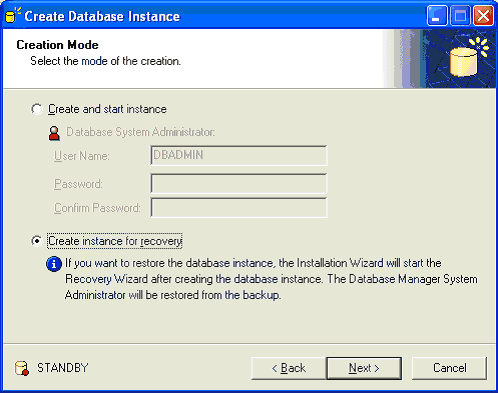
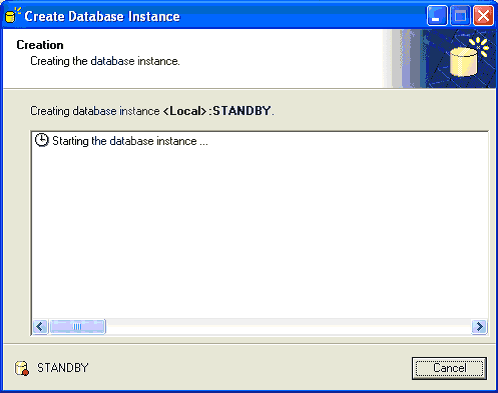
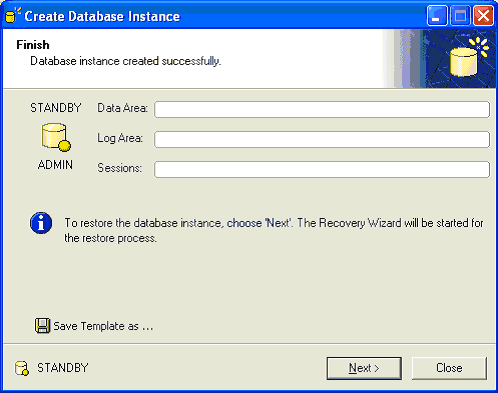
Be careful on the screen “Creation Mode”. Do not select “Create and start instance”! Once the standby system has been started, you cannot import log backups from the master system any more. Go for the option “Create instance for recovery” to start the Recovery Wizard.
Recovering the initial data backup from the master on the standby system
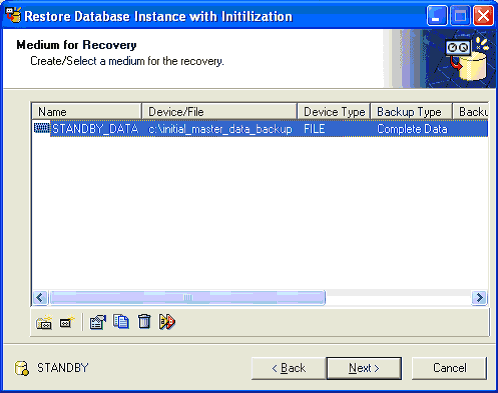
Use the Recovery Wizard to recover the initial data backup from the master on the standby system. The Recovery Wizard will be started automatically when you have finished the Instance Creation Wizard. Define a new backup media which tells MaxDB what kind of backup you want to recover and from which data source MaxDB shall read the data backup.


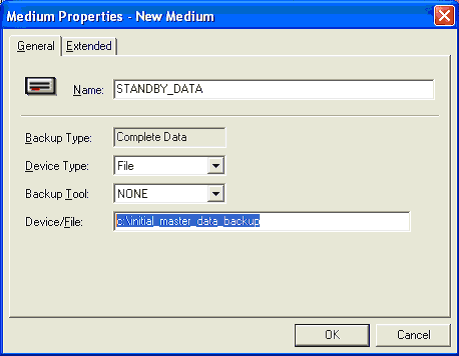
Give the backup media for the data backup the name “STANDBY_DATA” and let it point to the data backup of the instance MASTER which is “C:\initial_master_backup”. In a real-life scenario, two database instances wouldn’t access the same file. Having two programs accessing the same file is often a below average setup… Normally, you would install the standby system on a different host and copy the data backup (and the log backups) to that other host. Run the recovery.
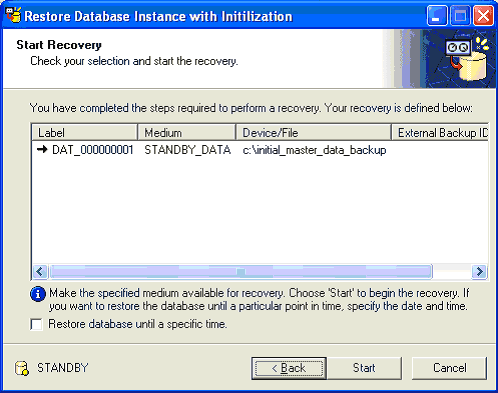
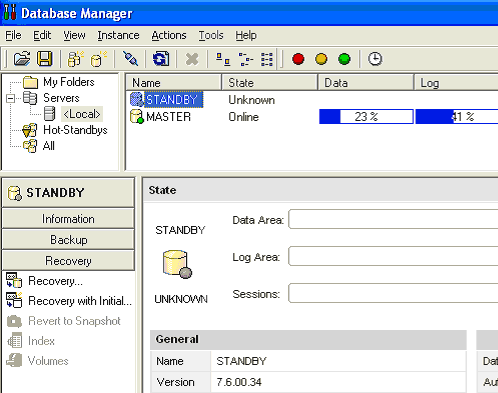
When you get to this screen you must not press “Restart”! If you press restart, the database instance will be put on online mode. Once this has happened, you cannot import log backups from the master system any more. Therefore: press “Back” or “Cancel”. In this case go for “Back”.

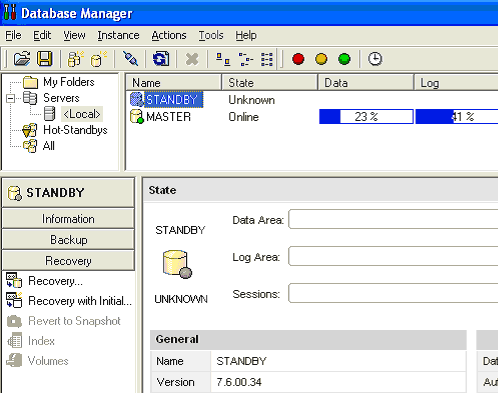
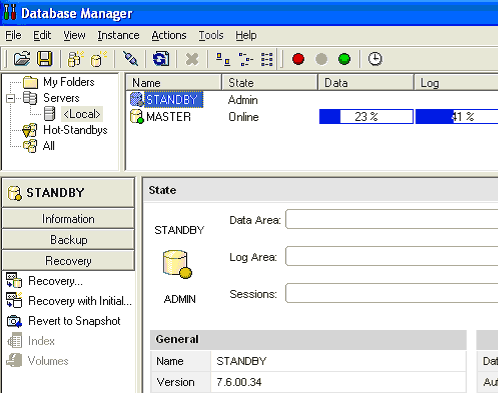
If you go for “Cancel” and at any time the Database Manager GUI shows that the database instance is Offline or in an “Undefined” state, never mind. Simply put the database instance in “Admin” mode and you can continue to use the Recovery Wizard. Again, you must not put the standby system in “Online” mode as long as you plan to continue with the import of log backups from the master system.
Recovering the first log backup on the standby system
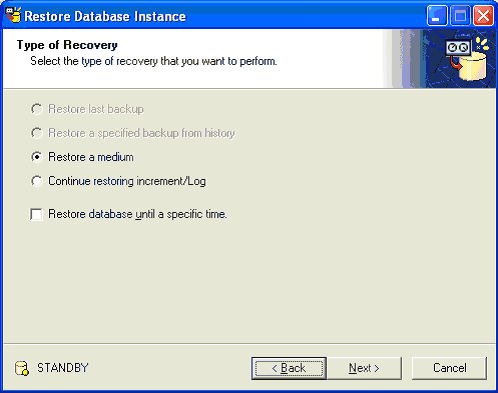
Continue with the Recovery Wizard and import the first log backup. Restore a medium, do not go for “Continue restoring increment/Log” ! In the next step we will define a new medium for the log backup to import.
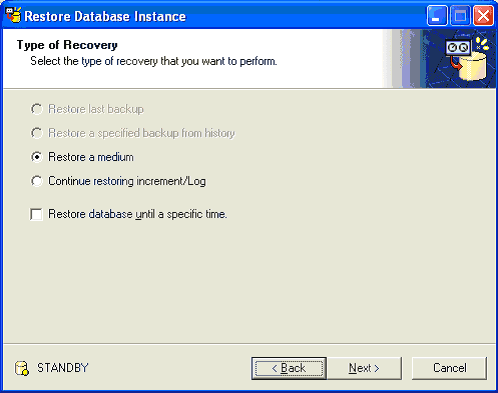
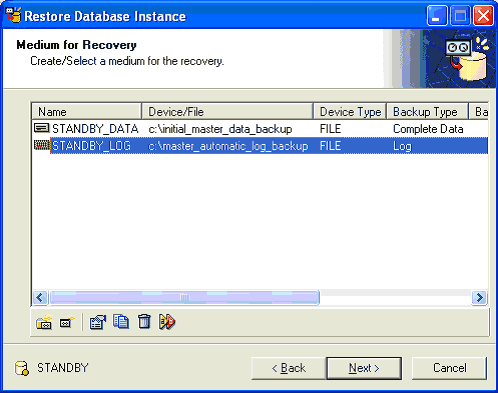
Continue with the Recovery Wizard and import the first log backup. Restore a medium, do not go for “Continue restoring increment/Log” ! In the next step we will define a new medium for the log backup to import. Define a medium for the Backup Type “Log Backup”, assign the name “STANDBY_LOG” and use the file “C:\master_automatic_log_backup”. Again, usually you would not have two database instances pointing to the same backup files but it works in this case and is good enough for a simple tutorial setup.
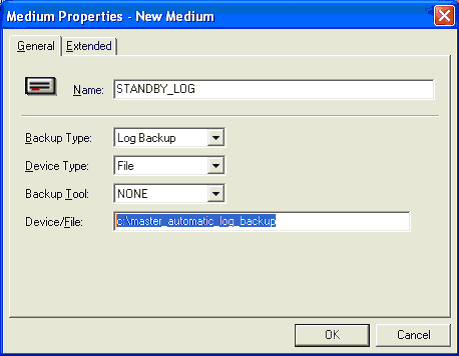
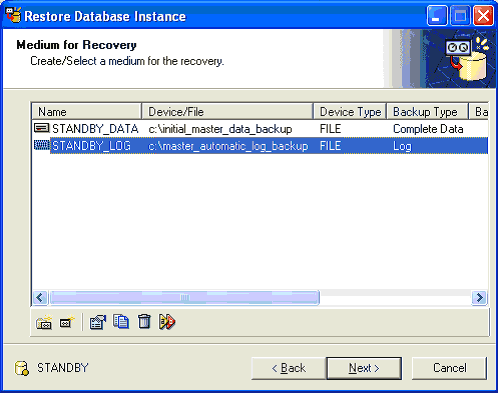
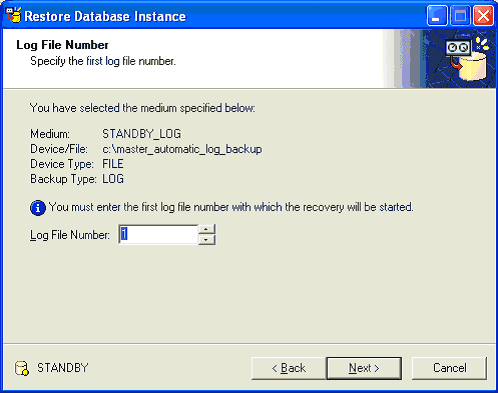
When MaxDB runs a automatic log backup, it looks up the file name in the correspondending backup media definition and creates a file with the name “filename.n”. “filename” is what you have specified in the field Device/File in the wizards. And n is a sequence number. That means that the first automatic log backup file will be given the name “c:\master_automatic_log_backup.001”, the second will get the name “c:\master_automatic_log_backup.002” and so on in case of the instance MASTER. When you recover such a log backup, the wizard will ask you for the sequence number to start with. Use “1” to start importing the very first log backup of the instance MASTER. As you see on the screen shot you can define an upper limit for the sequence number. The wizard will simply start with the sequence number 1 and advance it until it does not find any more files to be imported. If that happens you’ll see a “-3004” error message. That’s OK in this case, because there is no file “”c:\master_automatic_log_backup.002” to import at the moment.


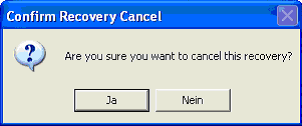
When the error happens, select “Cancel”. We know that it is impossible to import a second log backup and we really want to cancel the process at this point. If the standby system goes into the Offline mode, recall the note above and simple turn it in Admin mode again (not in Online mode!)

The ongoing log shipping
Now you have done the first log shipping: you have imported the first log backup of the instance MASTER into the instance STANDBY. But how to you continue with the log import once the master system has written new log backups? The answer is that you simply use the Recovery Wizard on the standby system to recover them whenever they become available. Let us show this procedure one last time, create a few more log entries on the master database in the same way we did it before and let us count the number of rows in the table again. After that we import the log backup into the standby system and turn it on to check if it shows the same number of records.
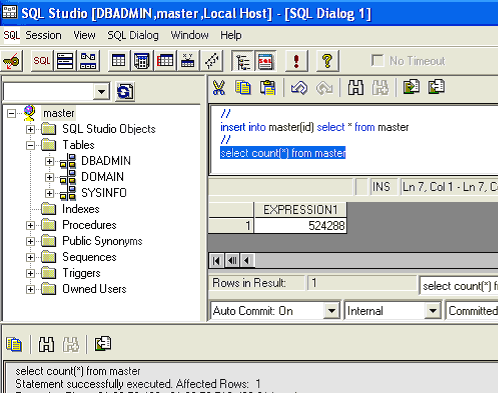
Use the SQL Studio to generate more records in the table “master”. Stop when the number of records equals 524288.
Check the Backup History of the instance MASTER in the Database Manager GUI to verify that there is at least one more log backup.
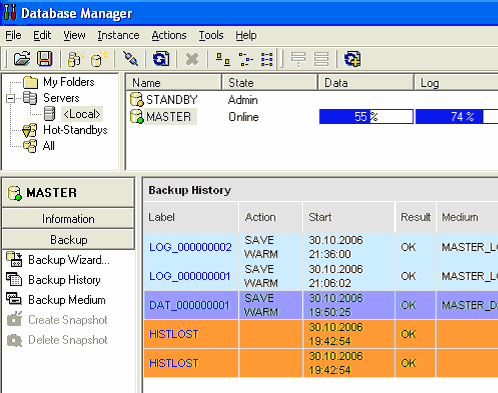
Switch the instance MASTER in Admin mode and run the Backup Wizard. As you learned before, the automatic backup is run as soon as one log sement has been finished. The latest SQL statements that have been run might not be part of the last automatic backup, because the log entries that belong to the statements might be stored in another log segment which is half-full. As it is half-full it has not been backed up already. Therefore we will run a manual log backup on the MASTER. We do this in Admin mode to ensure that no further SQL statements are run against the instance MASTER which could create new records and make our SELECT COUNT() test fail.
Use the backup media that gets used for the automatic log backup for the manual log backup.

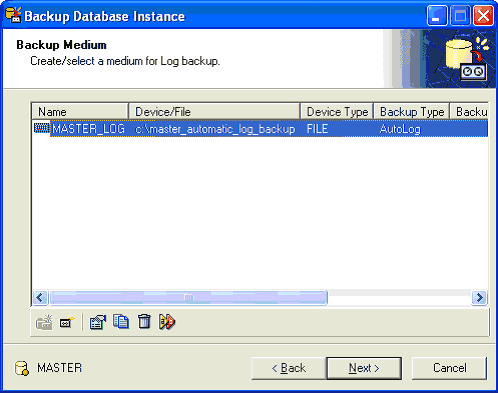
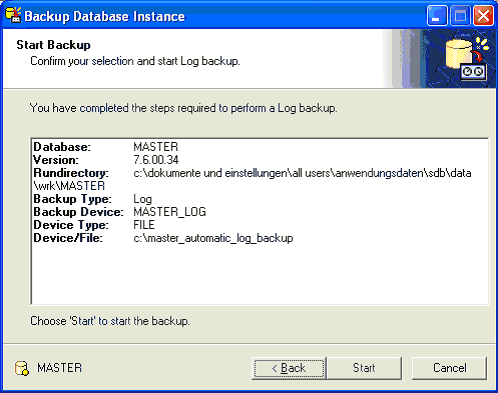

Verify that a new log backup has been created using the Backup History display.
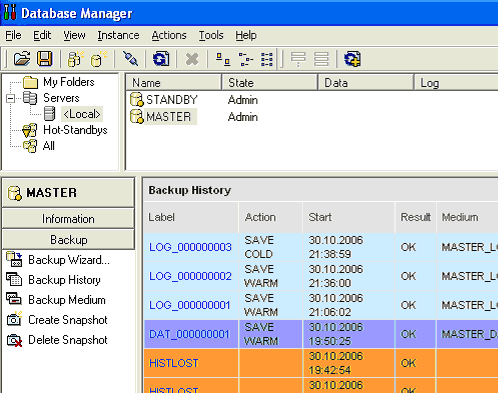
The last log shipping and turning the standby system online
Now we can do the final log shipping to update the standby system and turn it online. Make sure that the instance STANDBY is in Admin mode and start the recovery wizard. Recover the log backup exactly as you did before with one difference once the recovery stops with the error -3004.
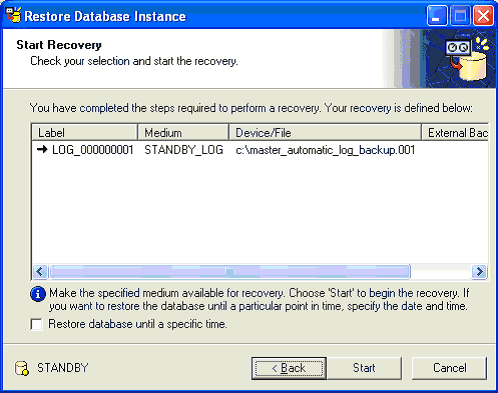

Normally you would press “Cancel”, leave the Recovery Wizard and start it again when you import the next log backup. But this time, press “Back” once the error has happed. In the screen that opens, select “Ignore”. This will tell the wizard to ignore the error message and to start the database instance instead of turning it Offline. The reason is that we confirm to MaxDB that the error is really a bogus message because we have no more logs to be imported and MaxDB may put the database in Online mode. Press “Next” and MaxDB tells you that the database has been restarted.


Recall that the start means that you cannot continue with the log shipping. You have ended the shadow database setup. Now you can use the instance STANDBY as you “master” system. Does the system really have all the data from the instance MASTER? Let us count the rows!
The glory details…
You see: as long as you know which buttons to press and which not it is easy, isn’t it? Ok, who is gonna write the tutorial that shows how to do it in the dbmcli ? I won’t!

One Comment
Leave a reply →